Authentication
Authenticate with the Findity APIs using OAuth 2.0 to obtain access tokens for all endpoints.
Obtain your API credentials
- Request login credentials to Findity's Admin Portal by contacting your project manager or Findity's support.
- Activate API connectivity on the Marketplace page.
- Obtain API credentials — you need a
client_idandclient_secretto authenticate. To obtain these, you log into your Findity Admin Portal using your login credentials and navigate to Administrators → API keys.
Keep your client secret confidential. Never expose it in client-side code or public repositories.
OAuth 2.0 overview
The Findity APIs use the OAuth 2.0 framework. Exchange your client credentials for an access token, then include that token in the Authorization header of every API request.
The API key has organization-level scope by default. For Partner or Client Application access, contact support.
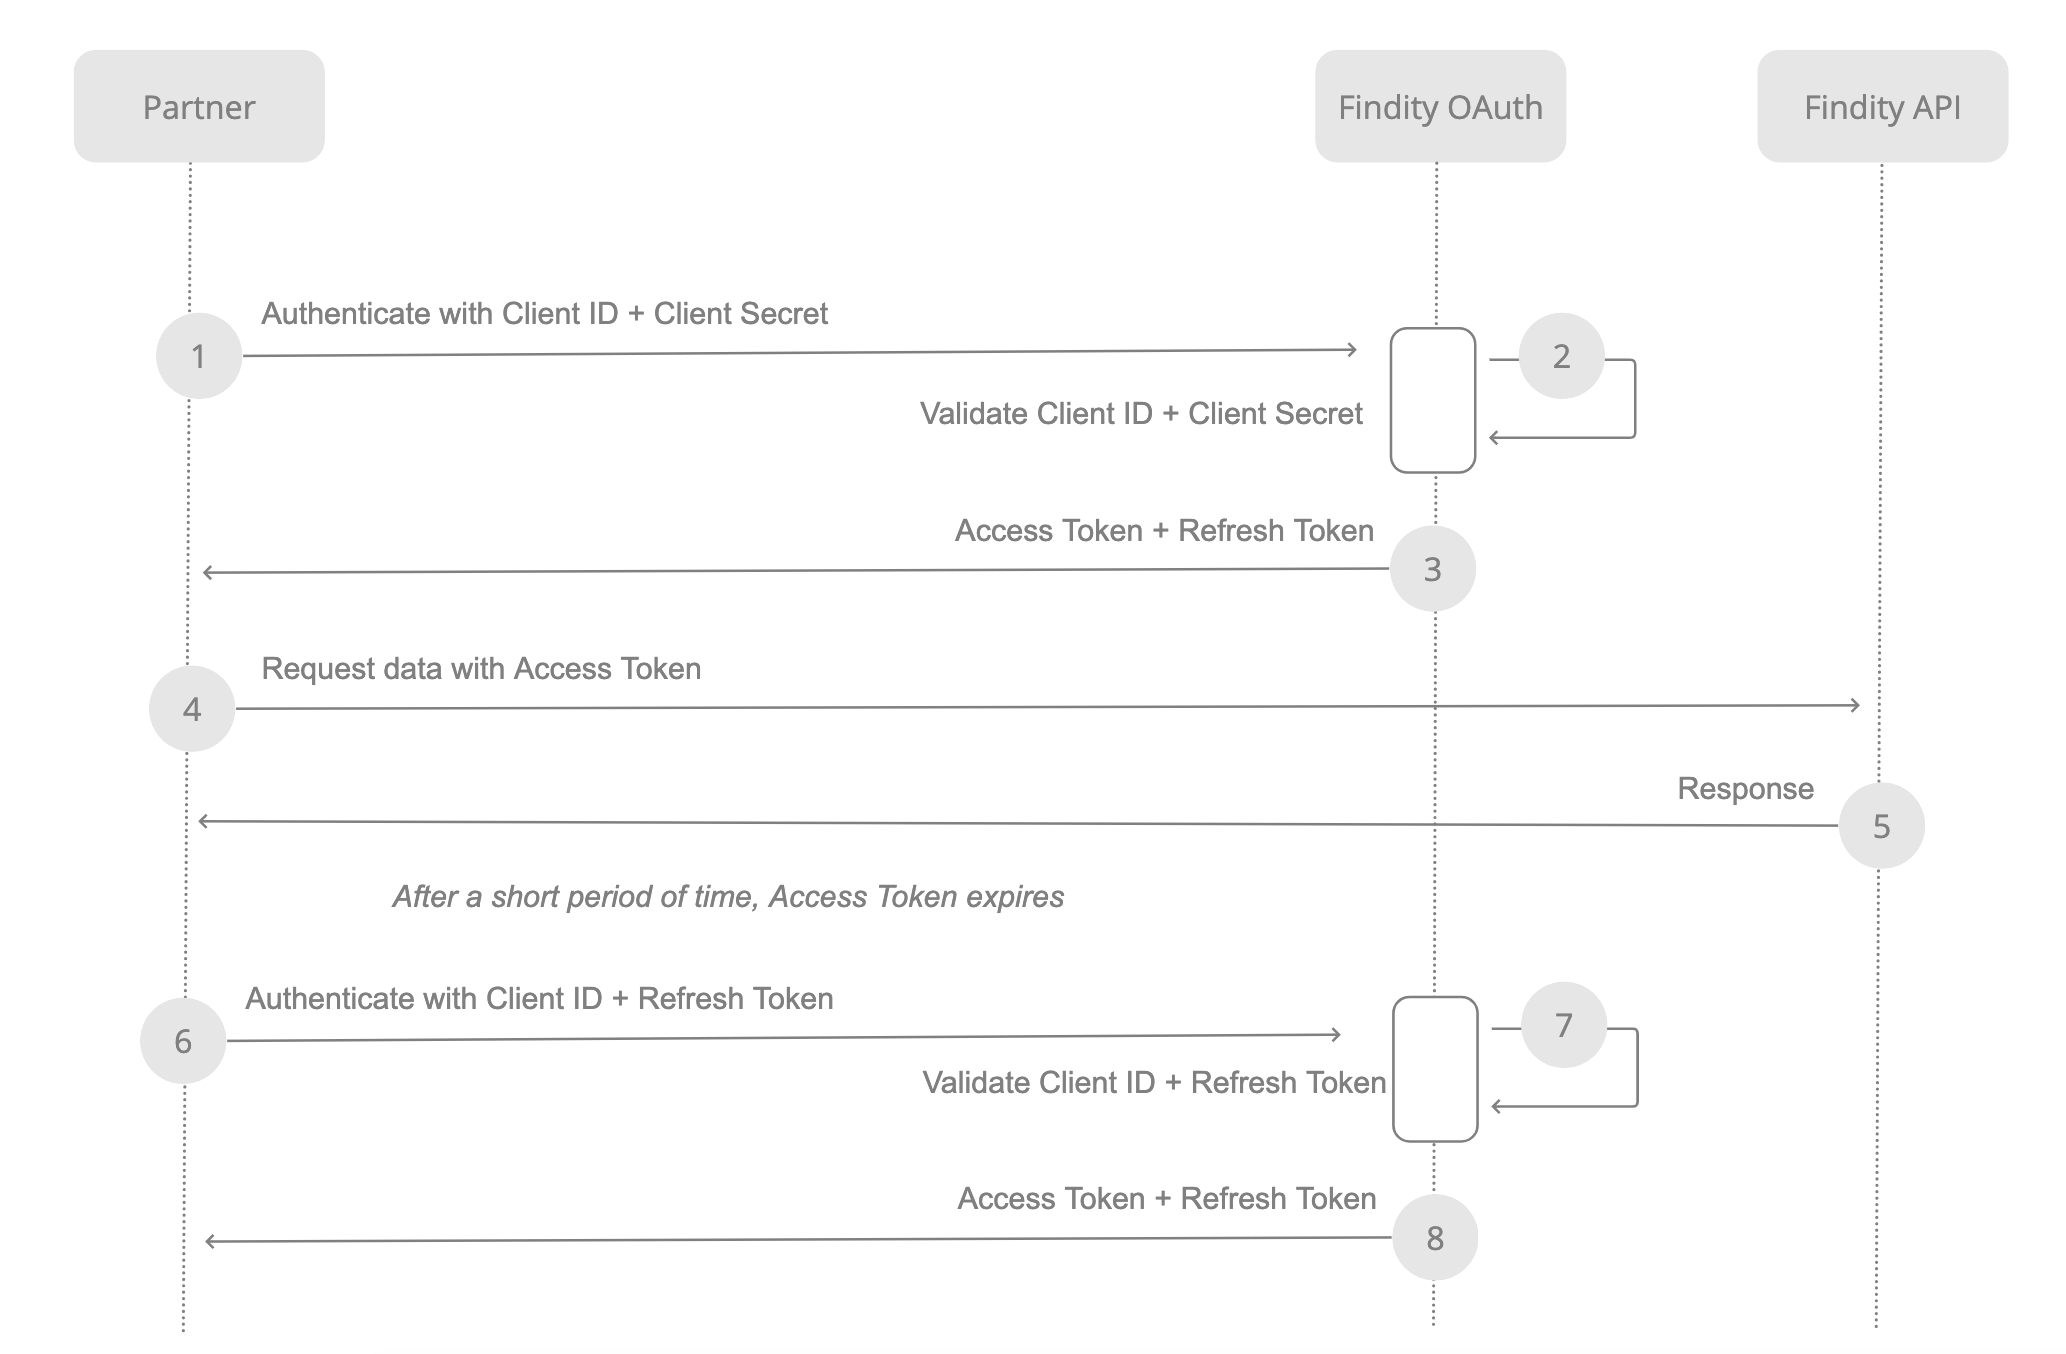
OAuth flow
Request an access token
Exchange your client credentials for an access token using the client credentials grant type.
curl -X POST "https://expense.findity.com/api/oauth/token/" \
  -H "Content-Type: application/x-www-form-urlencoded" \
  -d "grant_type=client_credentials&client_id=CLIENT_ID&client_secret=CLIENT_SECRET"
The response includes an access token, token type, expiration time (in seconds), and a refresh token:
{
  "access_token": "YOUR_ACCESS_TOKEN",
  "token_type": "Bearer",
  "expires_in": 3600,
  "refresh_token": "YOUR_REFRESH_TOKEN"
}
Include the access token in subsequent API requests using the Authorization header:
curl -X GET "https://expense.findity.com/api/v1/..." \
  -H "Authorization: Bearer YOUR_ACCESS_TOKEN"
When the token expires, request a new one using either your client credentials or the refresh token.
Refresh an access token
Make a POST request to the token endpoint with grant_type=refresh_token. Include the refresh token and client ID. A refresh token can only be used once — each response returns a new refresh token.
curl -X POST "https://expense.findity.com/api/oauth/token/" \
  -H "Content-Type: application/x-www-form-urlencoded" \
  -d "grant_type=refresh_token&client_id=CLIENT_ID&refresh_token=REFRESH_TOKEN"
The response contains a new access token and a new refresh token, in the same format as the initial token request.
Request a user access token
To act as a specific user (employee) — for example, when building against the Expense API — you need a user-scoped access token. This is a two-step process:
Requesting a user access token requires special administrator permissions. Contact your Findity contact person or reach out to support to get this permission granted.
Step 1: Request an authorization code by sending the user's ID (person ID or ExternalSourceID) to the authorization grant endpoint. This requires a valid organization-level access token.
curl --request POST \
     --url https://stage-expense.findity.com/api/oauth/authorization-grant \
     --header 'accept: application/json' \
     --header 'authorization: Bearer ACCESS_TOKEN' \
     --header 'content-type: application/x-www-form-urlencoded' \
     --data user_id="8ab28c3e6f8023c3016f8046be110102"
The response contains an authorization code:
{
  "code": "YOUR_AUTHORIZATION_CODE"
}
Step 2: Exchange the authorization code for a user access token.
curl --request POST \
     --url https://stage-expense.findity.com/api/oauth/token \
     --header 'accept: application/json' \
     --header 'content-type: application/x-www-form-urlencoded' \
     --data grant_type=authorization_code \
     --data code="YOUR_AUTHORIZATION_CODE"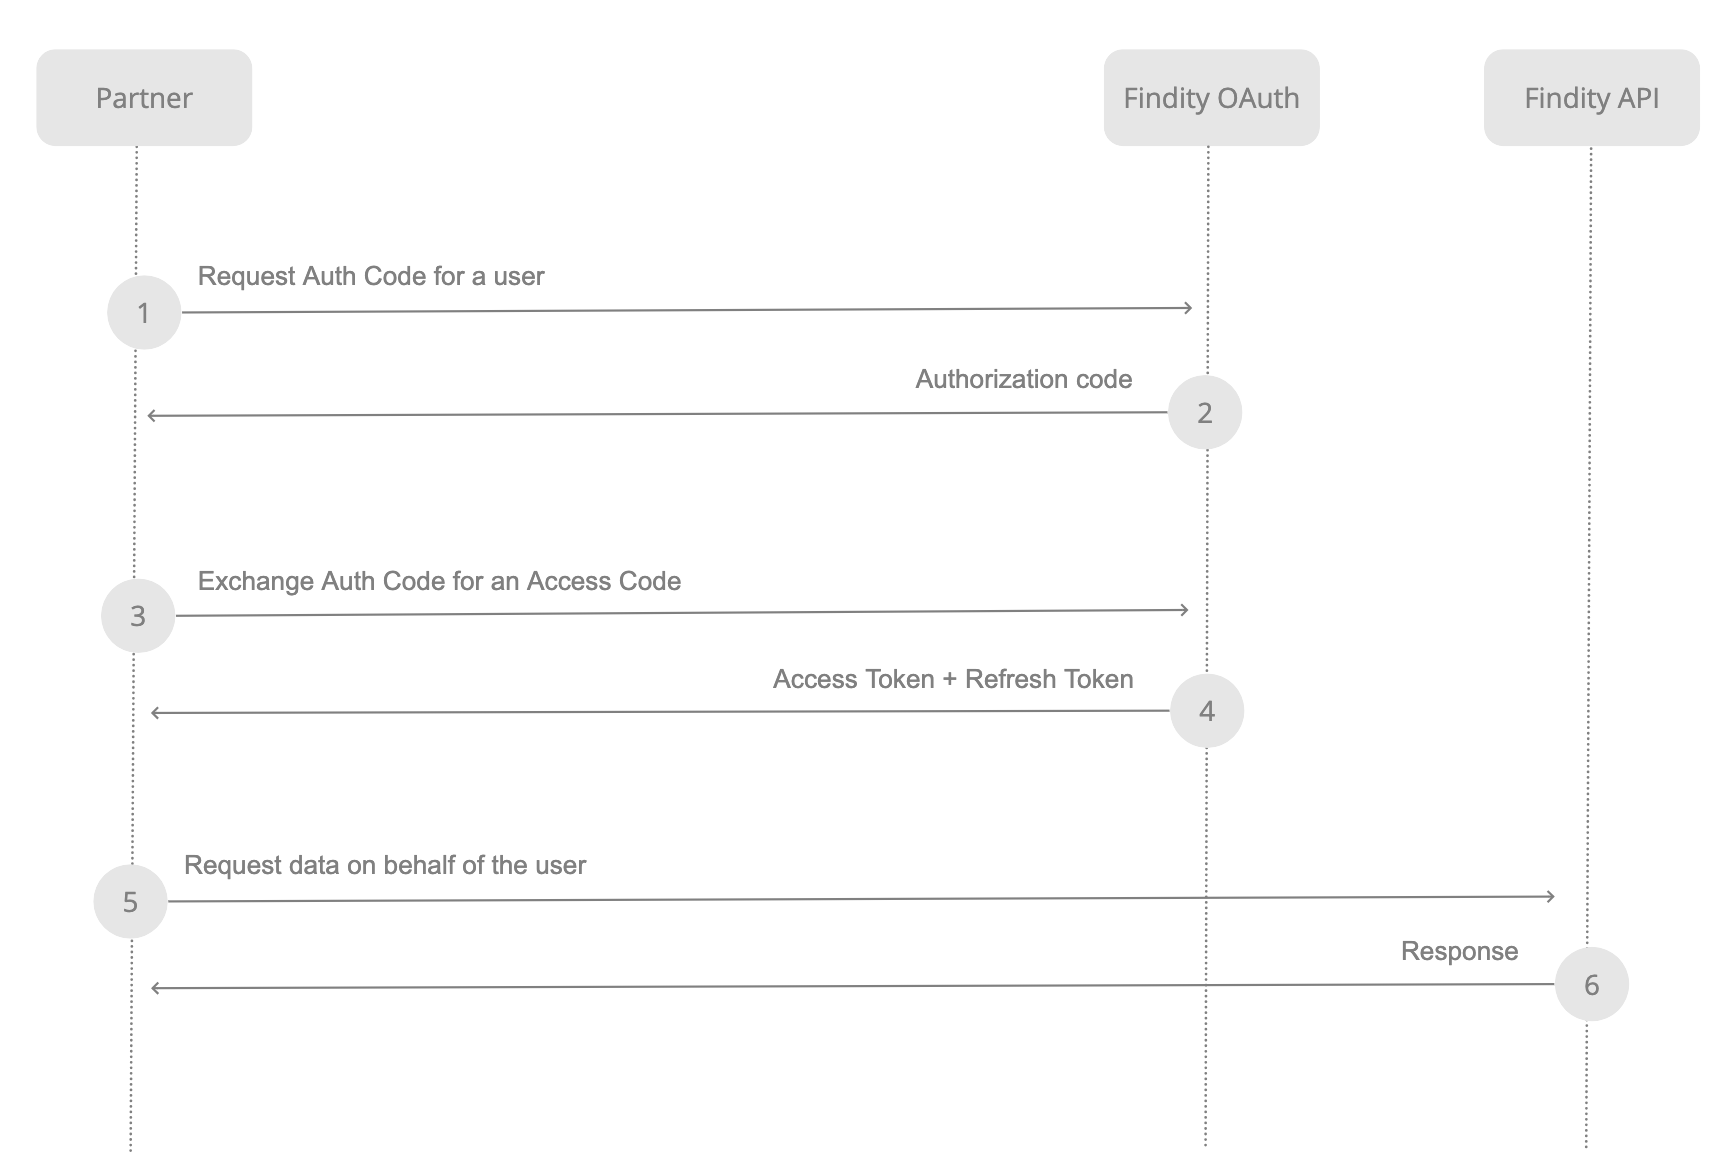
We support long-lived access tokens, but we recommend using the OAuth process described above for a more secure implementation.
Updated 5 months ago