Approval on dimensions
In this example, we are going to setup a dimension with a user preset and approval structure.
Note that we will use an organization with externalSourceId.
Create a dimension
We use this endpoint to create a new dimension called "Costcenter"
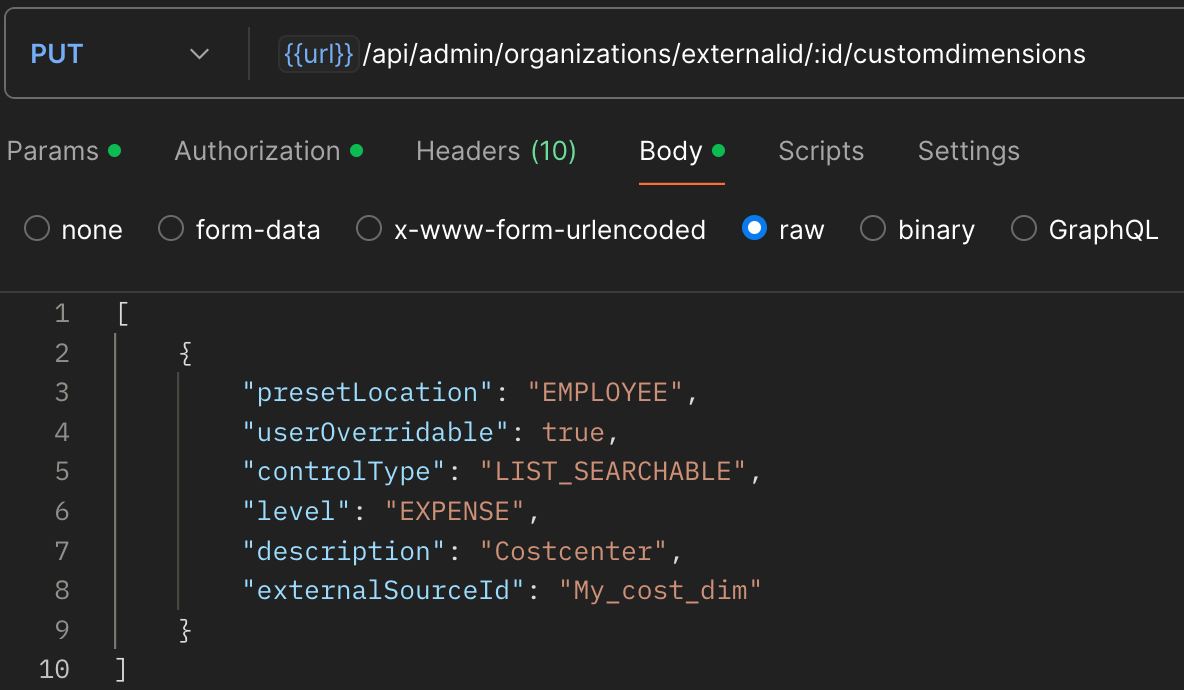
Create a new dimension
Available fields:
- description is the name of the dimension and department in this example.
- level can be
EXPENSEorREPORTwhich dictates where the dimension is used by a user. - presetLocation, we want to be able to preset this on the user.
- controlType, the user can be presented with a field of type free-text, a list, or a searchable list.
- userOverrideable, means that the user is allowed to change from the preset to another value.
To get the id of the dimension, use this endpoint. You need this later to add preset values on a user.
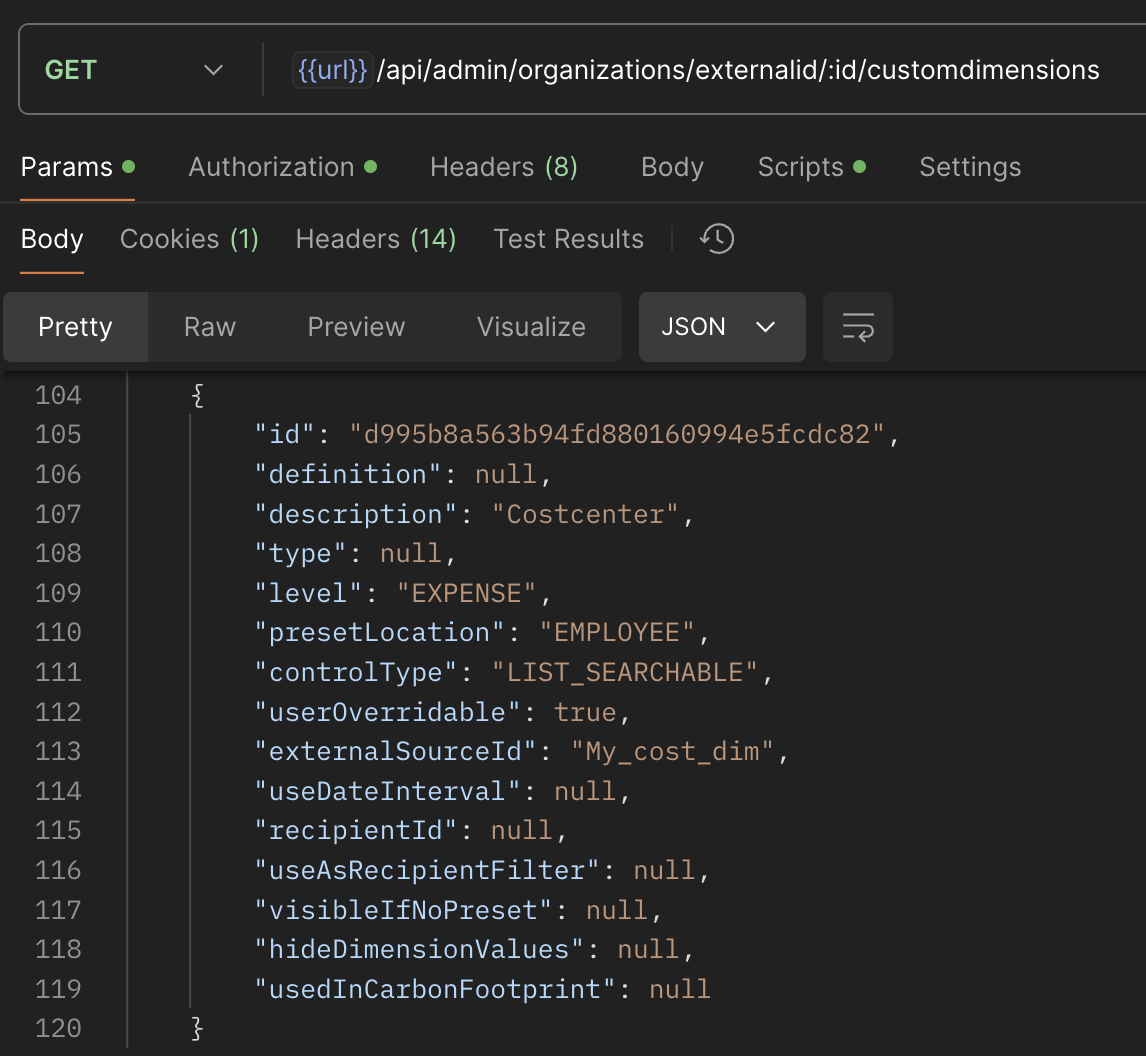
Get a list of dimensions
Add values
We use this endpoint to add data to our newly created dimension.
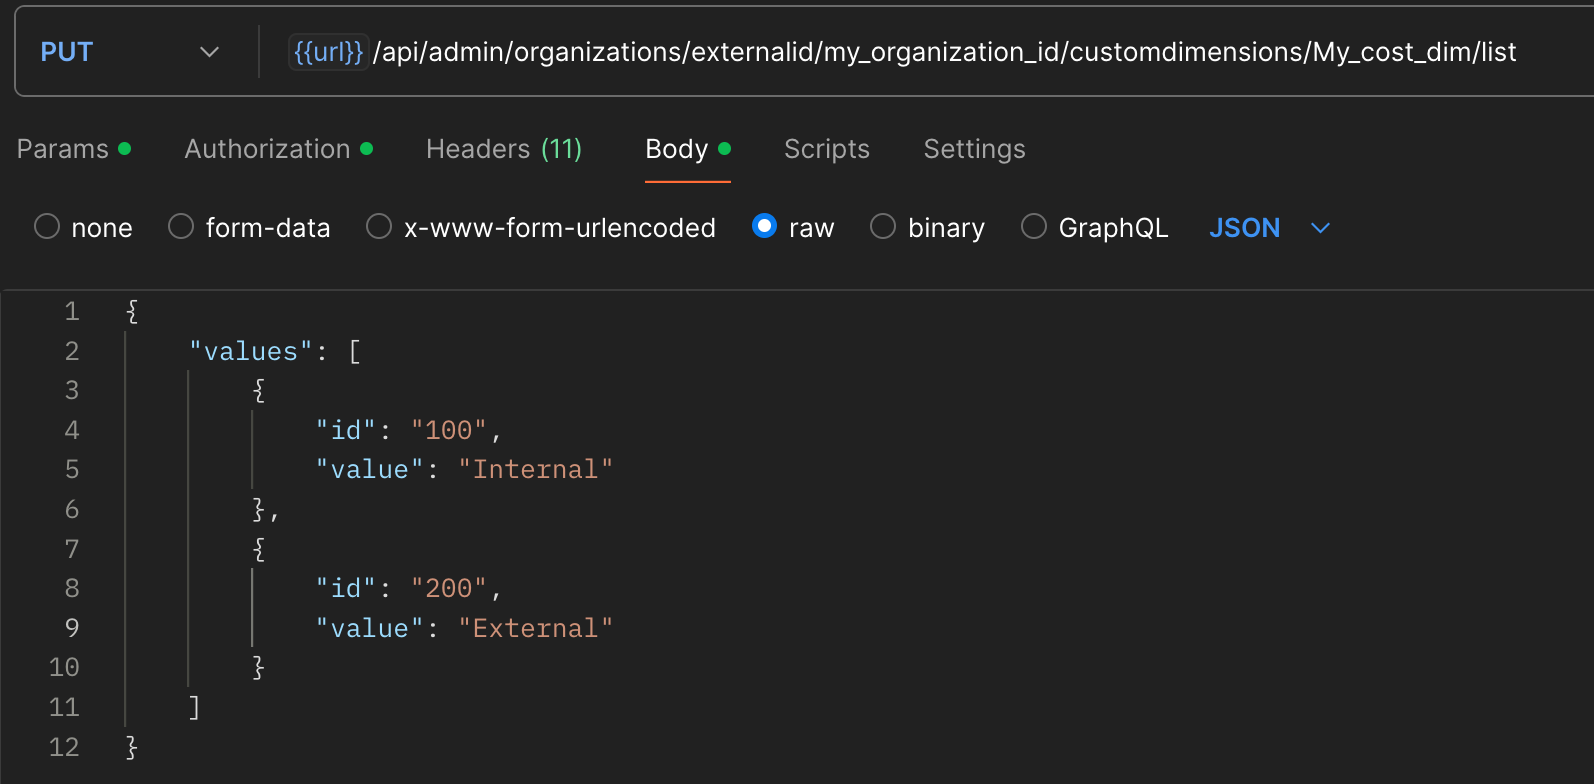
Adding some cost centers
Creating users
This endpoint will help you to create a new user. Below we create a test user with a preset dimension value, we use the id of the Costcenter dimension and set the value 100 on the user. Make sure to set externalSourceId on both the user and the person, this id should be an identifier known in your external system. It is used for addressing the user directly, and can also serve a purpose if Single-sign-on login is used.
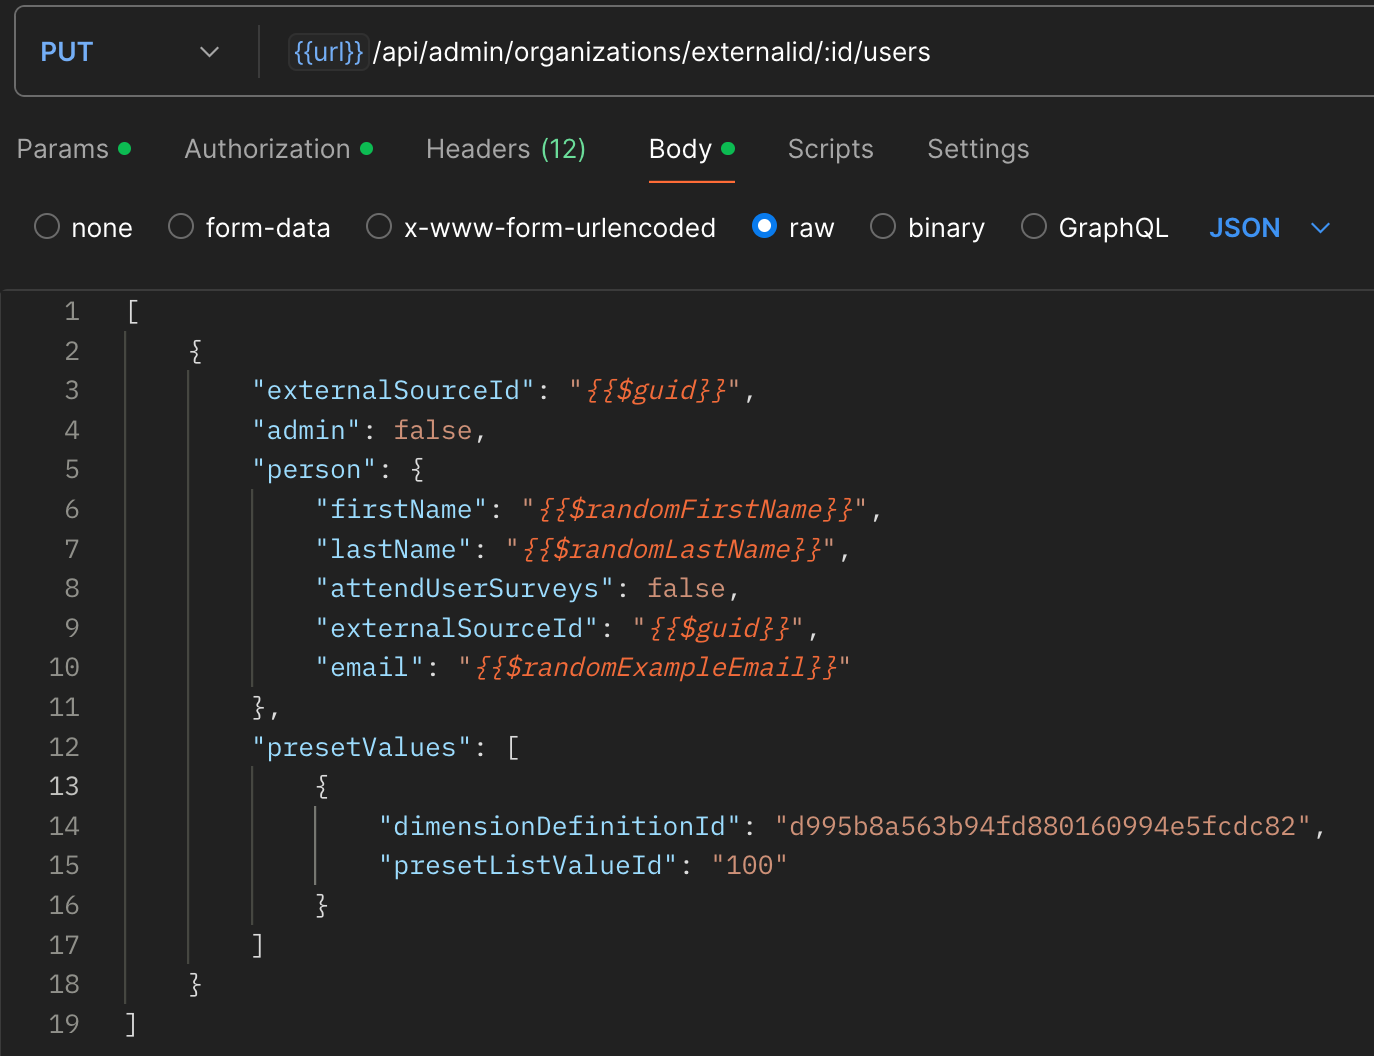
Create a user
Now the user can create expenses where a preset cost center is set.
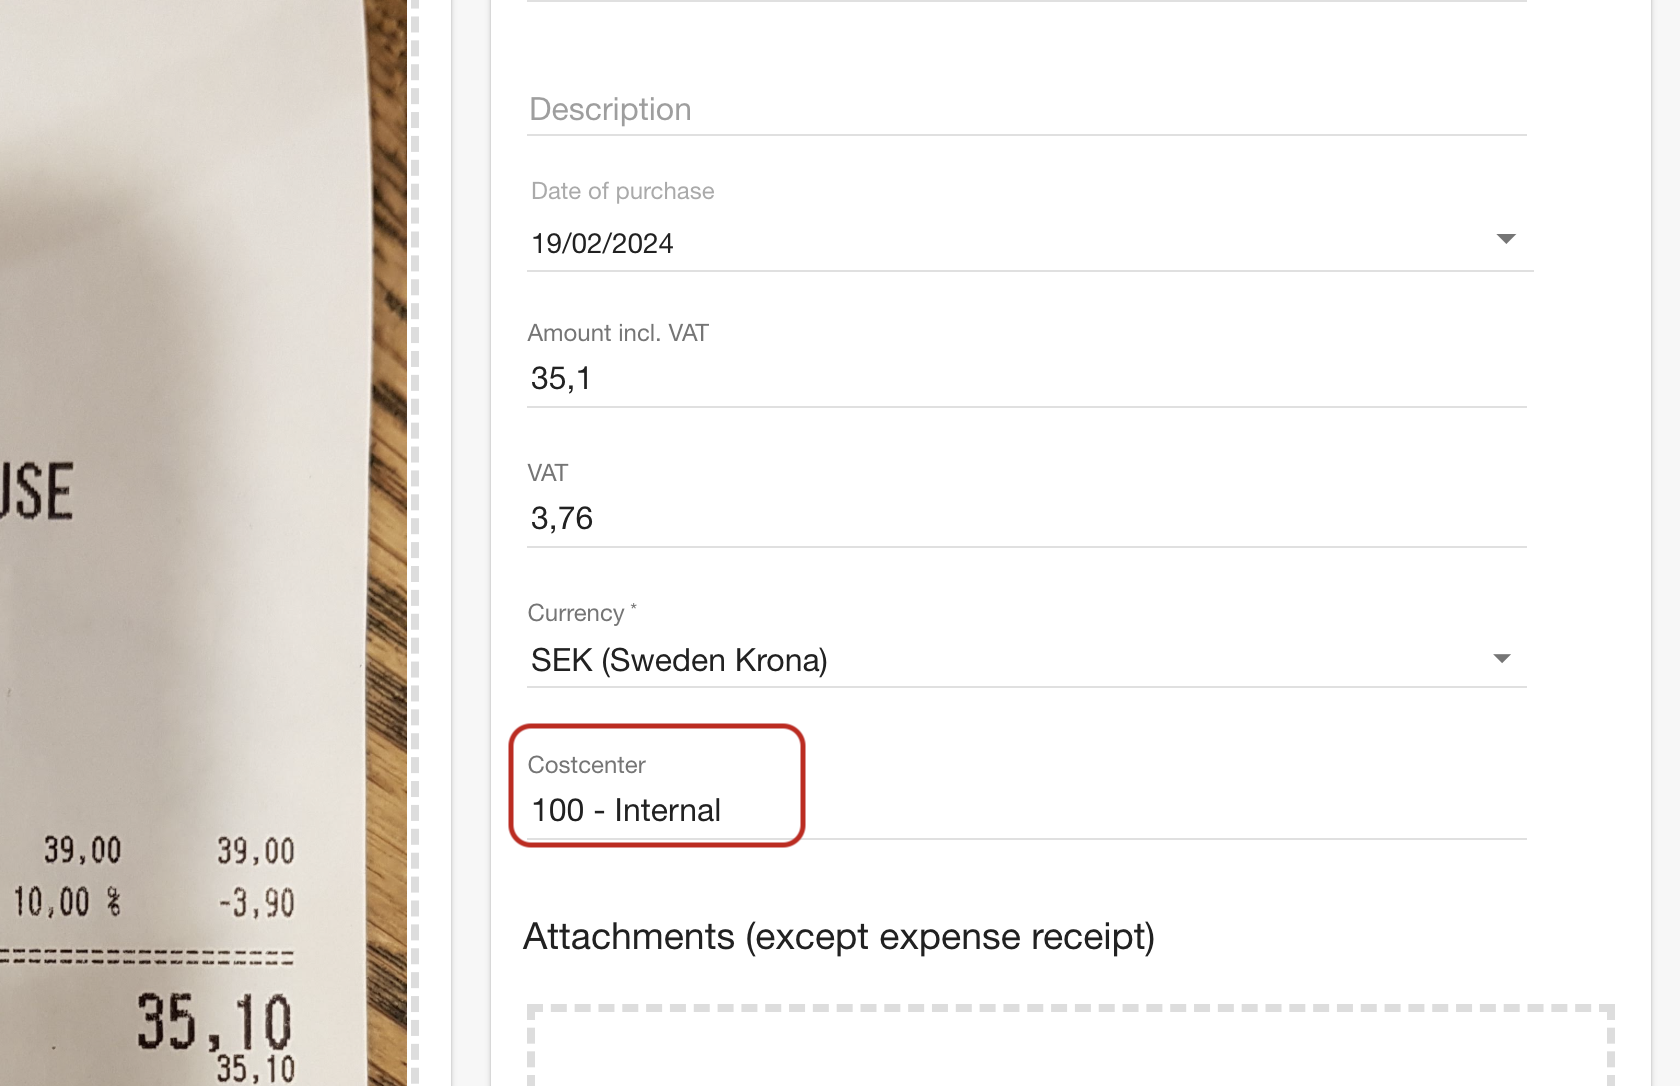
The user creates an expense with a preset cost center
Someone needs to approve
First and foremost you need to activate approval, which needs to be done in the Admin UI.
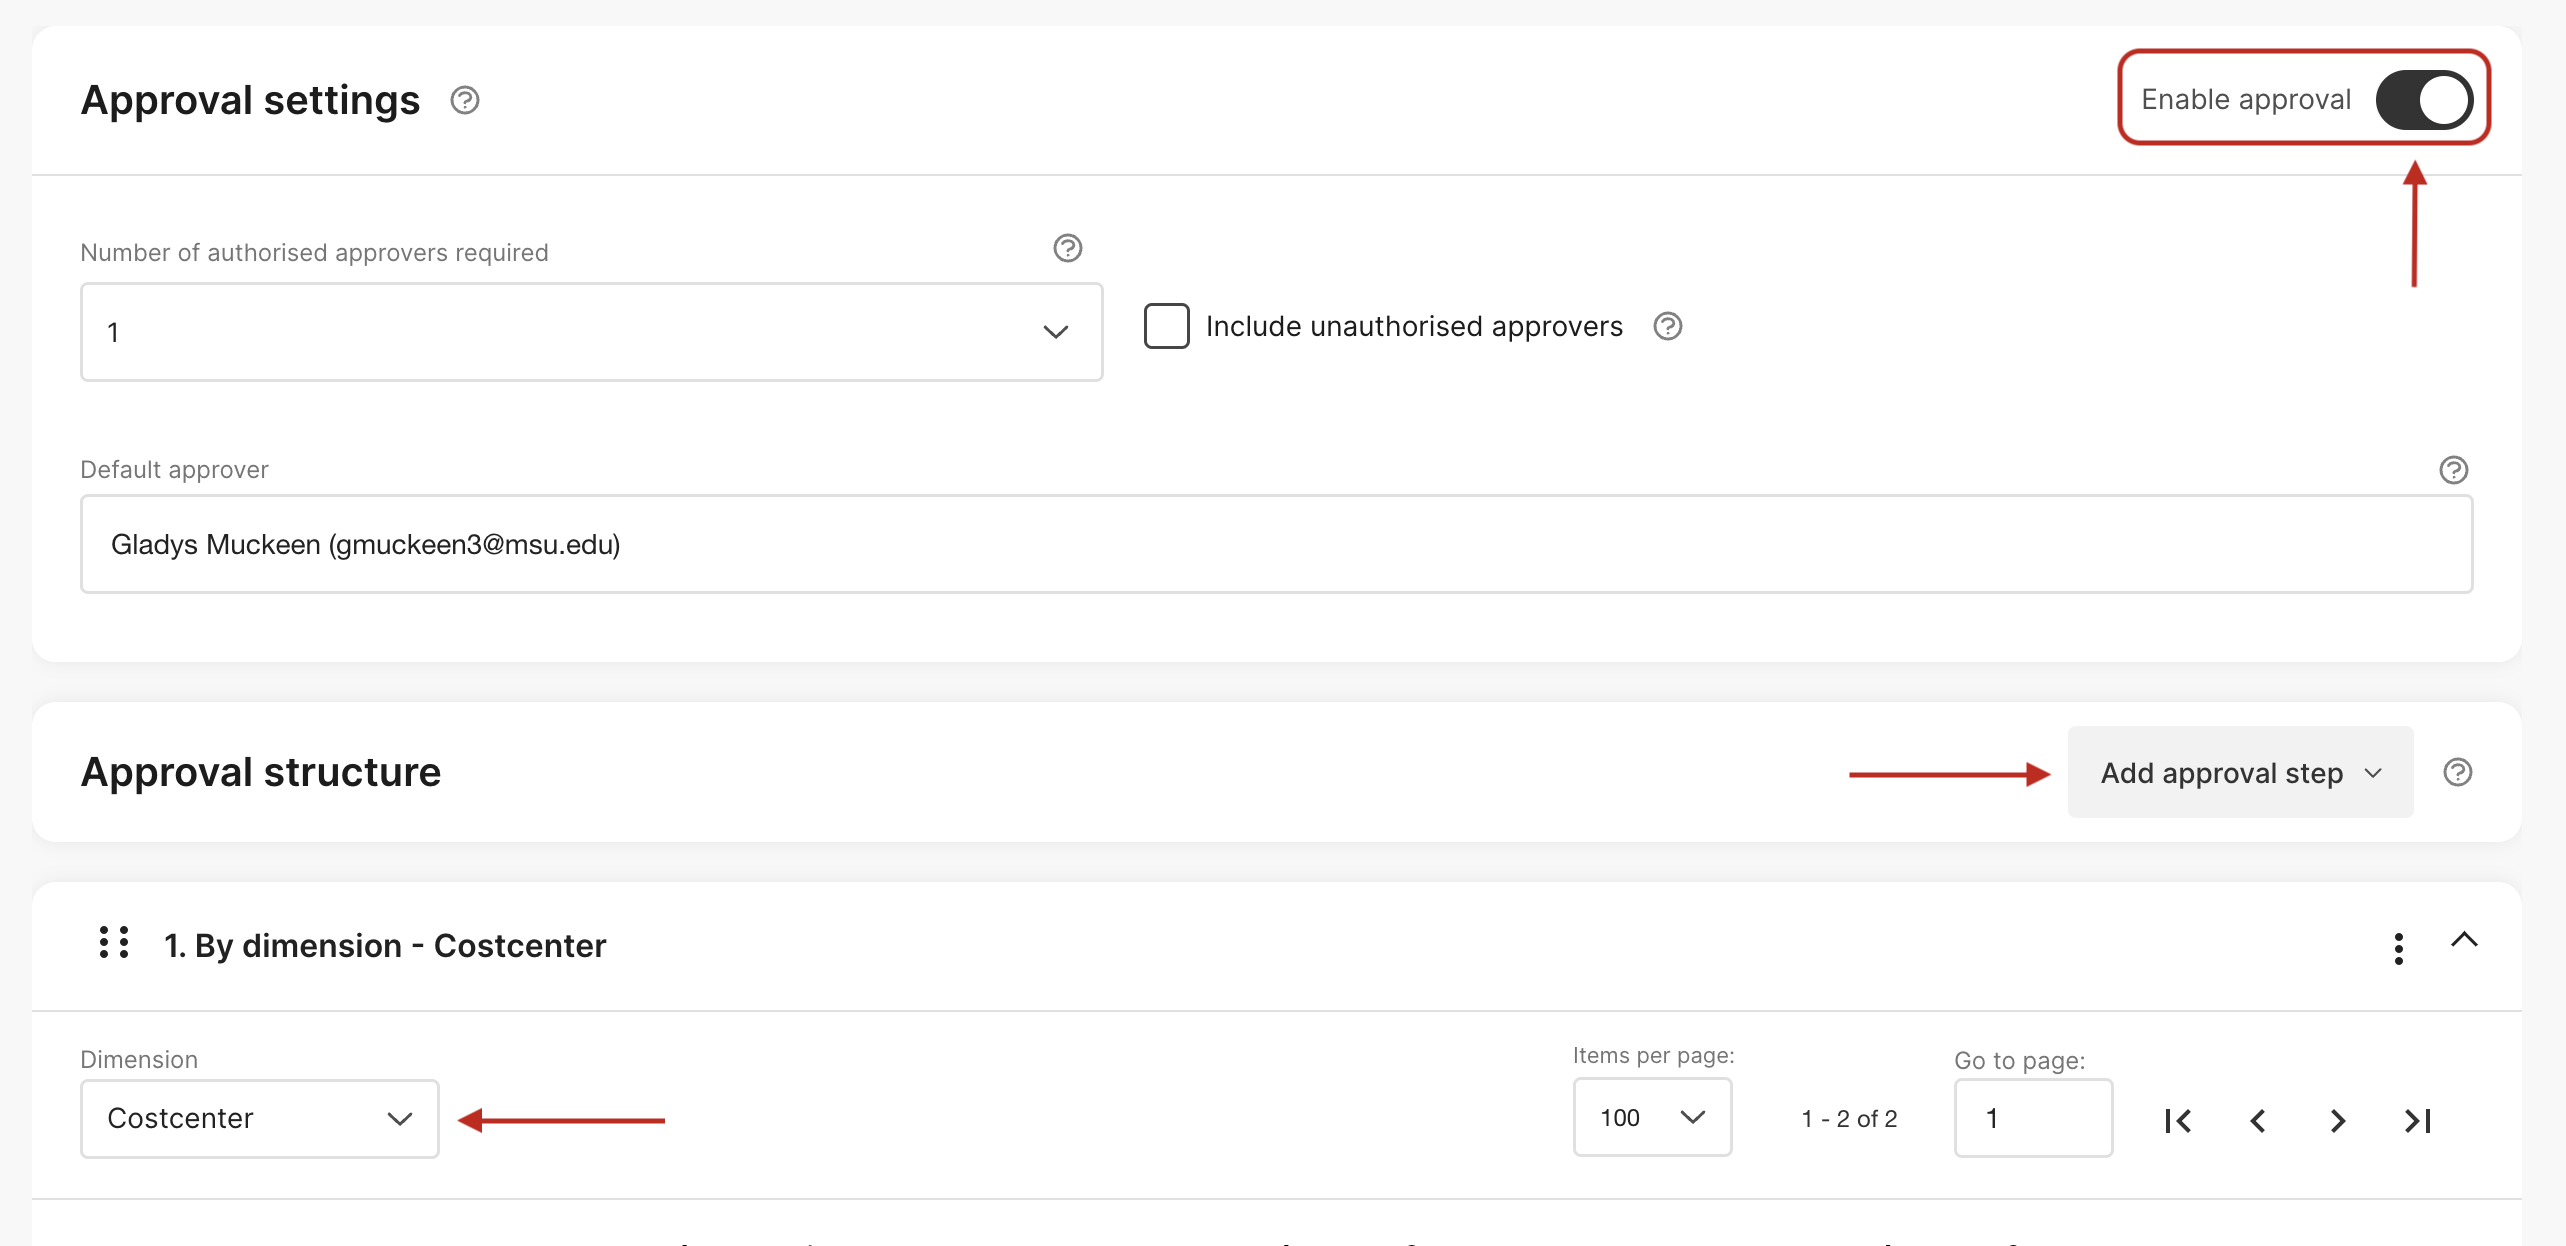
Admin UI approval activate
If you lost track of the externalSourceId of the users, you can list all users in the organization with this endpoint and get the externalSourceId from the person. In this case, Guilda is our manager that we want to set as an approver.
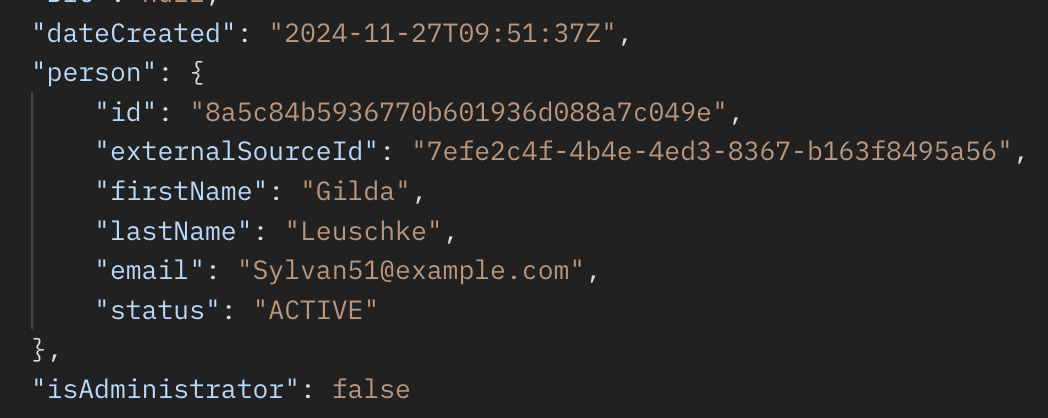
person id on a user
To set an approver head over to this endpoint below we will assign Guilda as an approver on cost center 100. The sortOrder: 0 field will her as the first approver.
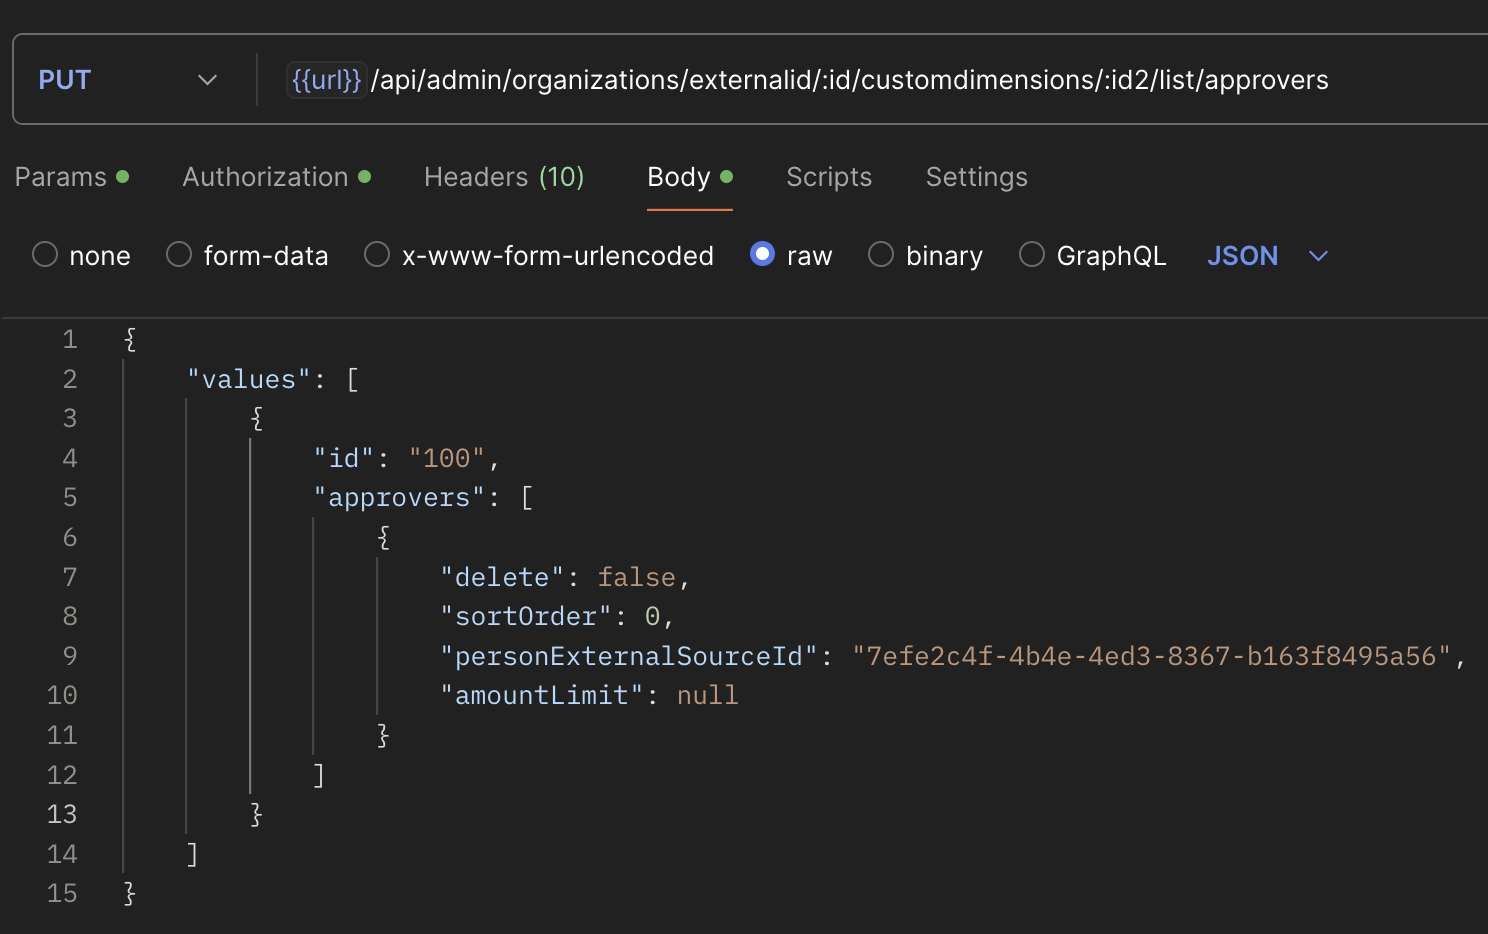
Set approver on a dimension
Updated 5 months ago
