Card transactions
Integrate corporate card expense management into your platform by submitting card transactions to Findity, which automatically generates expenses for cardholders — enabling reimbursement and bookkeeping.
This applies to financial institutions (banks) that issue cards or partners providing cards via CaaS (Card-as-a-Service) platforms.
Customer onboarding
When a customer signs up to use the expense management service, they activate the expense solution from within the card issuer's scope — preferably from "My Pages" or another suitable location hosted by the card issuer.
This initial step performs three API calls:
| Step | API call | Description |
|---|---|---|
| 1 | Create organization | All cardholders reside within an organization — the entity representing a customer (legal entity). |
| 2 | Create cardholder | The user in the Findity platform. |
| 3 | Create administrator | At least one admin must be assigned to the organization. |
Add card to user
In the admin view, add employees as cardholders. An employee can have multiple cards, but most of the time one card connection is sufficient.
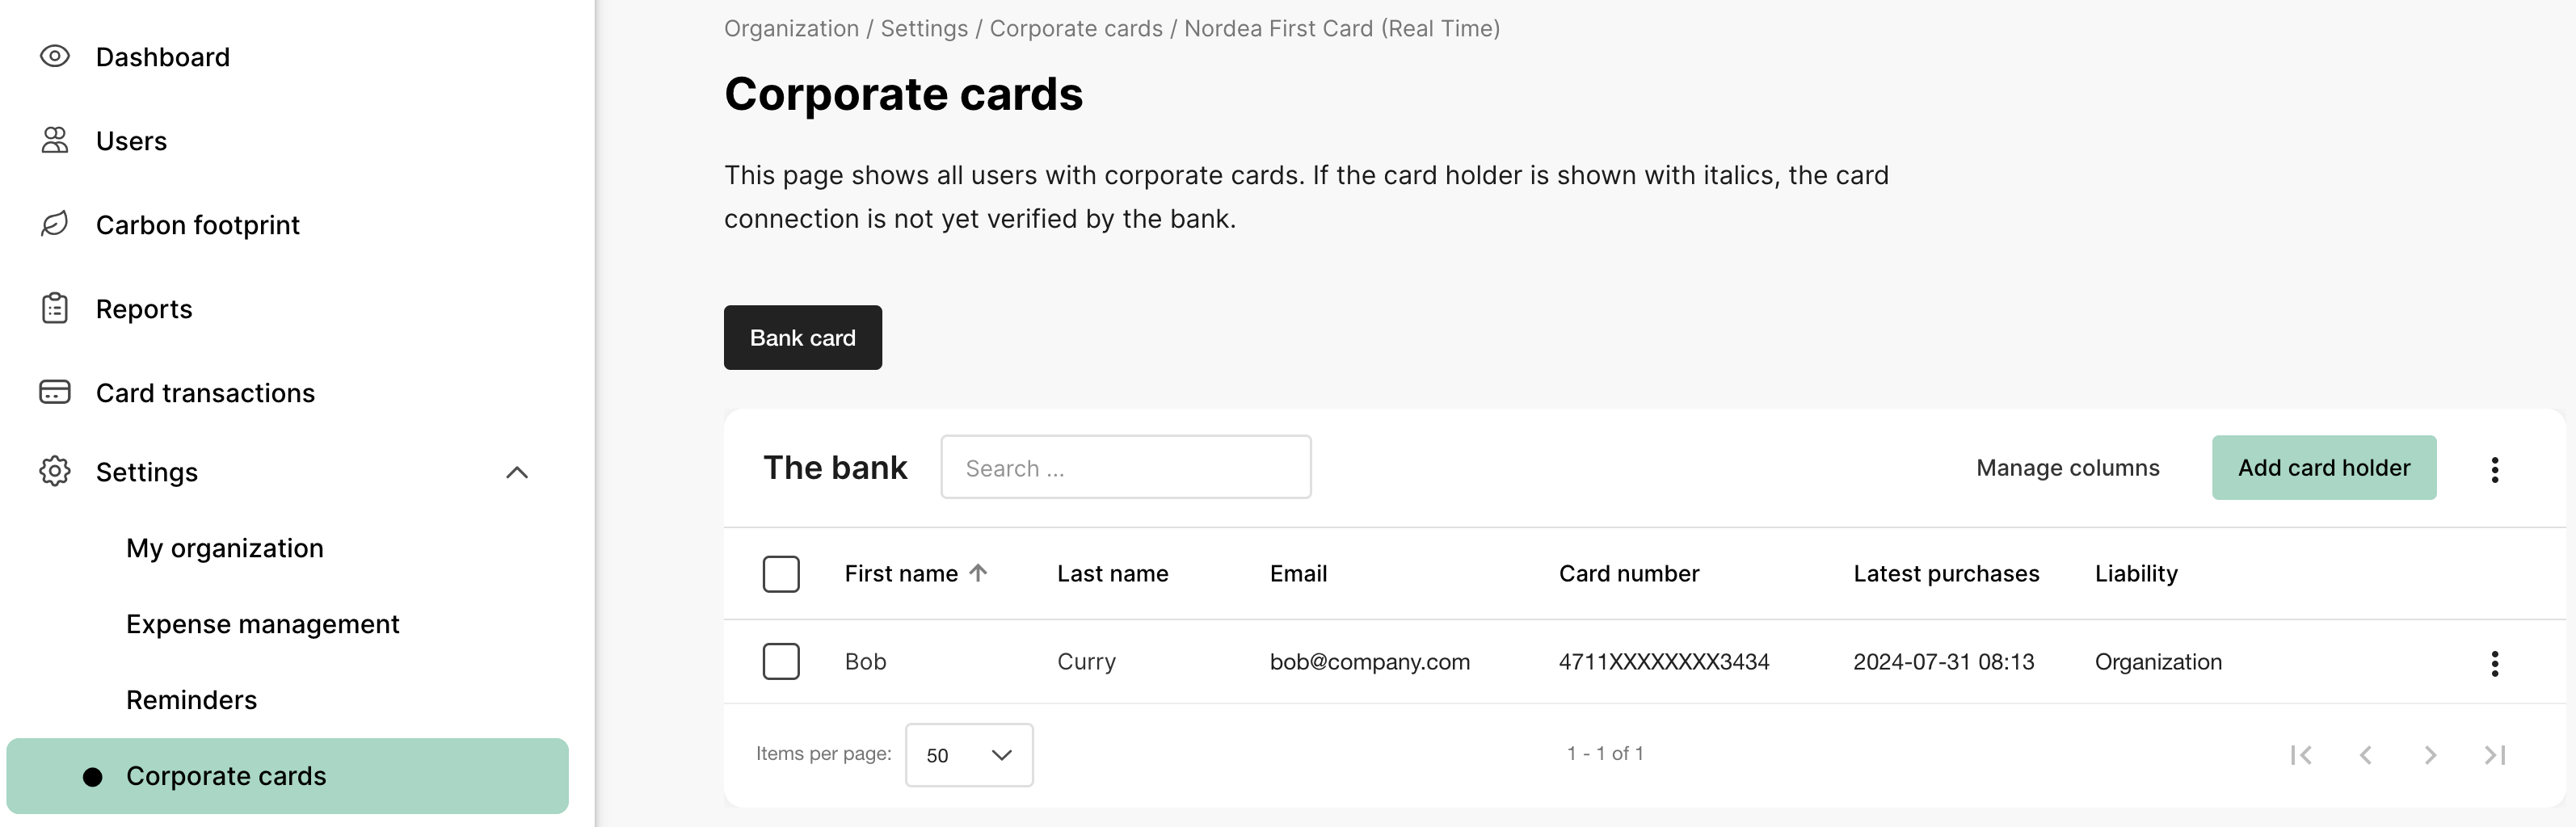
Corporate cards have a payment liability setting that dictates how expenses are handled. Payment liability determines who receives and pays the card invoice.
| Liability | Invoice sent to | Reimbursement | Can delete expenses | Behavior |
|---|---|---|---|---|
PRIVATE | Cardholder | Yes | Yes | Employee is reimbursed. Private purchases can be deleted. |
CORPORATE | Company | No | No | Expenses are locked until the transaction is updated with an invoice number and CAPTURE status. A corporate card report groups all purchases with the same invoice number. |
DEBET | Company (direct) | No | No | Charges go directly to a corporate bank account. Transactions are added to bookkeeping only. |
Generate expenses from card transaction
Notify Findity as soon as a purchase is made by a connected cardholder. The closer to real-time the notification, the better the cardholder experience — the expense becomes available in the app immediately after purchase.
Each request instantly generates an expense and sends a push notification to the cardholder's app, allowing them to attach a receipt and submit for approval.
POST /v1/connect/cardtransactions{
"cardType": "<issuer>",
"posName": "Store or merchant",
"description": "Information of the purchase",
"billingAmount": 250,
"billingCurrencyCode": "SEK",
"merchantAmount": 24,
"merchantCurrencyCode": "EUR",
"merchantMcc": 5921,
"transactionDate": "2024-07-29T12:41:00Z",
"transactionId": "464411049",
"eventType": "AUTHORIZATION_ACCEPTED",
"organizationId": "8a5c9cc090e8ccae0190edd18eca07d3",
"personId": "8a5c848990e8cbb70190edd6cea907ba",
"transactionOwnerName": "Bob Curry",
"supplierCardId": "721c47e6-ba56-4c1f-82a2-1d3dbf8c81f2",
"liability": "PRIVATE",
"cardNumber": "XXXXXXXXXXXX6789"
}Request fields
| Field | Type | Description |
|---|---|---|
cardType | string | Name of your card or financial institute. Must be configured by Findity initially. |
posName | string | Store or merchant name — shown on the expense for purchase origin clarification. |
description | string | Additional purchase information shown on the expense. |
billingAmount | number | Amount charged on the card, in the cardholder's local currency. |
billingCurrencyCode | string | The cardholder's local currency (ISO 4217). |
merchantAmount | number | Original purchase amount in the merchant's currency. |
merchantCurrencyCode | string | The merchant's currency (ISO 4217). |
merchantMcc | number | Merchant Category Code. |
transactionDate | string | Date of purchase (ISO 8601). |
transactionId | string | Unique identifier for the transaction. Used when updating a transaction. |
eventType | string | Transaction status from the card scheme. See event types below. |
organizationId | string | The Findity organization ID that the cardholder belongs to. |
personId | string | The Findity UUID of the cardholder. |
transactionOwnerName | string | Name of the cardholder. |
supplierCardId | string | Your identification of the card. |
liability | string | Payment liability — dictates expense behavior. Values: PRIVATE, CORPORATE, DEBET. |
cardNumber | string | Masked card number (e.g., XXXXXXXXXXXX6789). |
Event types
The eventType field tracks the transaction lifecycle. The typical flow is an initial AUTHORIZATION_ACCEPTED followed by a CAPTURE when settlement is completed.
| Event type | Description |
|---|---|
AUTHORIZATION_ACCEPTED | Initial authorization approved |
AUTHORIZATION_REJECTED | Authorization was declined |
AUTHORIZATION_REVERSAL | A previous authorization was reversed |
CAPTURE | Settlement completed — transaction is final |
REFUND | A refund was issued for the transaction |
→ See the Card transaction API reference for full request and response details.
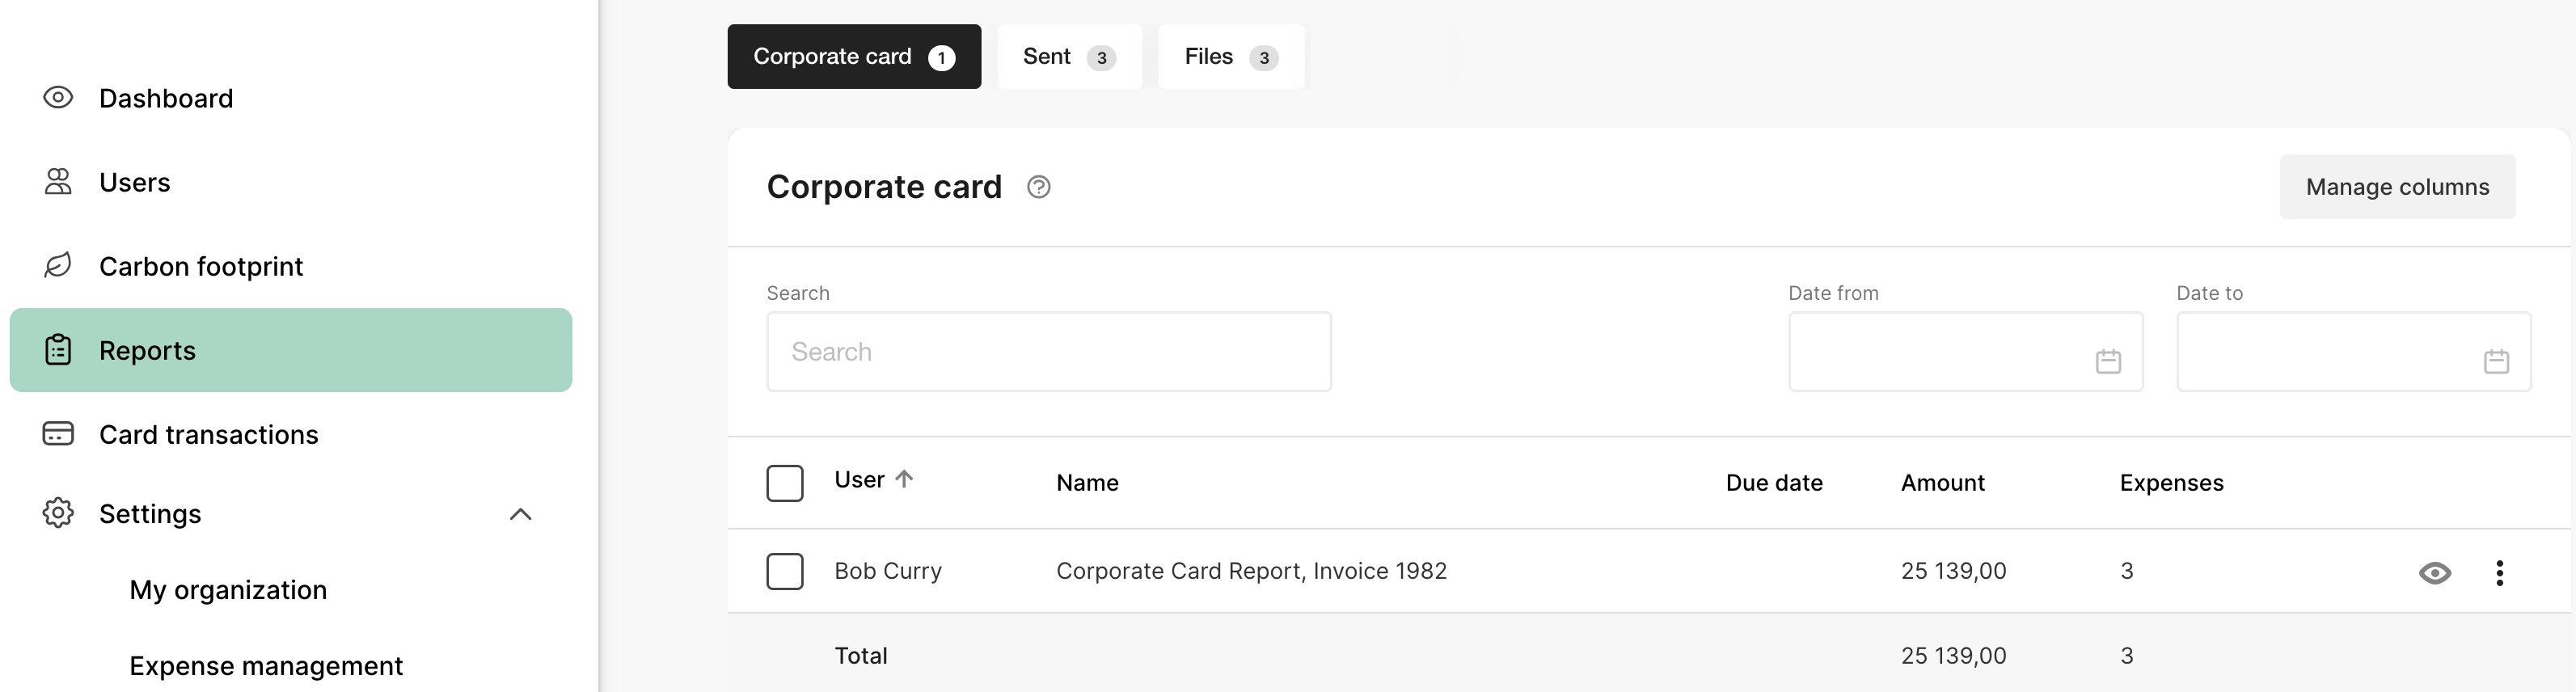
Invoice matching
For corporate-liability cards, all expenses created from card transactions can be grouped within an expense report by invoice number. This facilitates financial control — ensuring all expenses are accounted for and matched to the correct invoice.
Update the transaction with an invoice number to group expenses into a corporate card report. As an administrator, you have an overview of all ongoing corporate card reports and their invoice numbers. Administrators can send reminders to users to finalize and submit their reports.
Updated 4 months ago